Wednesday, December 31, 2014

Early Morning at Beaver Lake

Jacob has been trying to take some sunrise pictures out at Beaver Lake (where we keep our canoe) for a while, and we've never managed to get the right weather, all of his equipment (including the all-important SD card), the right time, etc.  So this morning we set out before daylight in the icy dark around 7:00.  For once it all came together!  Here's J sitting out on a pier (bottom left), and on the bottom right, just before the sun came up-- the sky was pink and white with streaky clouds that reflected in the water-- perfect.  I sketched boats while wearing my fingerless gloves-- a very chilly process.
I especially liked a couple of silvery aluminum canoes that had long rows of rivets.  These were pulled up on the shore, and next to them was another aluminum canoe-like boat.  In the next couple of days Jacob should be posting some of his photos from today on his blog.  

After our outing we didn't waste any time getting to Greenlife for a warm breakfast.  When I got home, I sat in my studio and drew the tulips.
All eight of them are blooming now, and I wish I could paint the sweetness of the aroma that surrounds them!

Monday, December 29, 2014

Teething Bees Coming Soon

On the right is a springerle, a delicious anise-flavored molded cookie.  This one was made by my friend L, who used her German grandmother's recipe.  These cookies were traditionally hung on Christmas trees and then given away as gifts to visitors.  L gave us a box of them yesterday, and they are too pretty to eat, to delicious not to eat.
And today Maya came over to make a prototype of our new teething bee design.  We made it out of honey-colored, black, and light blue towel cloth, and we think its textured material will be very inviting for teething babies to chomp on.  Sewing it was tricky.  Since we sewed the stripes onto the honey-colored cloth, when we sewed one side to the other the machine had to sew through six layers of very thick terrycloth.  When we sewed through the side with the wings, the layers increased to eight layers.  Maya did this part of the job completely alone.  These will soon be for sale exclusively in West Asheville at the Bee Charmer store at their Haywood Road location.

Sunday, December 28, 2014

Day in the Country

 Today we drove up to our friends' L and Bs house, a handmade house deep in the countryside in the high mountains north of Asheville.  We were going to spend a day with them and some of their friends decorating lebkuchen, cooking together, hiking, playing/listening to others play music, and relaxing in the comforts of their off-the-grid home.  One of my favorite things to do at their house is explore their collection of interesting objects.  On the right are a jug vase with a candle in the top and a very small ceramic cup made by a local ceramics artist.  The cup is much smaller than the jug, and its colors are blues, greens, yellows, and white predominantly.  I want one of those cups!
 We often hike through the woods that separates the house from L's studio and B's office, and I have never before been able to find my way through the woods without much help.  SO today I decided to draw a map as we walked.  L suggested I look with open focus to better discern the trail from the surrounding forest floor.  I took off my glasses, and was surprised at how much easier it was to notice where the trail went when I wasn't focusing intently through glasses.  I've been practicing going without glasses a lot lately, like the way it feels to have more open, relaxed vision.  So on the way home I led the group and didn't make a single mistake for the first time ever.
On the left is an old out building near the studio that seems to have a mural on its side.  It looks like ice floes in an ocean.  On the right is a quick sketch of a Queen Anne's lace flower that had its seeds held in a nest formed by the dead seed heads.  All of the dried QA lace flowers had this odd seed nest.  On the far right is one of the guests playing a dulcimer while several other people played fiddle, guitar, banjo.

This is one of what seemed like a hundred lebkuchen.  Decorating them with music going on all around us helped the cookies come out looking like dancing women!

Saturday, December 27, 2014

Friday, December 26, 2014

Play

I'm in the bardo between ideas, and one strategy I use to steer my way through is to go back into old drawings and try force-fitting, in a light way,  two very different subjects that grab me. 
The charlottes in among the sprouting tulips remind me in an odd way of Owl Man in his bamboo grove.  Owl Man has a broken leg these days, and the reject charlottes are reminiscent of him.  This is not a matter for thinking or making an effort.  I'm just playing along to see what, if anything, coalesces.

Thursday, December 25, 2014

Tuesday, December 23, 2014

Laertes and Penates

 A few weeks ago I acquired a new household goddess at the Francine Delany Craft fair, and here she is on the left.  The man who  made her said he just puts together things that seem to go together;  when I spied this beauty on his table I scooped it up to go on the same diningroom wall as the stuffed angel figure that I found at Eastern Market in DC a few years ago.  This two buzz and hum on the blue-green wall and animate the whole room.
The two little urns are ceramic god-like containers that I got from my friend A's cousin when she was visiting the college many years ago and had a show in our gallery.  They seem ancient to me, and they're full of good juju.  The woman peeking out from behind the small print is actually a fragment of a drawing/collage that I bought a long time ago.  I look at it every single day.  It's a triptych, and this is part of the bottom panel.  She guards secrets for sure.

Monday, December 22, 2014

Action in the Woods When It Seems to Be Standing Still

I went out to the woods at near-dark today (when the ubiquitous dog walkers were finally off the trails-- I got bitten by a dog who was on a leash the other day, so I'm trying to find a time and trail that isn't clogged with dogs and dog owners)  Everything is so still and frozen-feeling.  Down on the ground the piles of black walnuts are reduced to a few broken hulls, but there are cracked acorns everywhere.  I picked up some and noticed that those cracks were made by new rootlets.  So there IS some action, only it's not easily visible.  The seeds are being released from their hulls, and some are releasing themselves.  Outer hulls are shed and now inner shells are cracking.  The cycle keeps going.  Interesting to see a pale oak rootlet angling downward toward the ground from the crack it has somehow made in the acorn!

Sunday, December 21, 2014

Seeds for Solstice

All these seeds, hard little packages of sunlight, waiting in the dark days, following secret clocks of light and temperature and moisture.  Happy Rebirthday to the Sun!

Saturday, December 20, 2014

The Dear Homelies

P and I put up our tree today and had our usual nostalgic romp through the ornaments.  I selected the five homeliest of the ornaments to feature in today's blog post.  These are ancient ornaments, but they are always hung on our tree.  Sometimes we have to punch new holes for the hangers because the insertion places are getting more and more fragile.  The hanger on one of these has migrated along the side several times.  But here they are:  on the left, dating from 1978, a bell painted by two-year-old Erik when he was a student at the ECDC at St. Mary's College, Notre Dame, Indiana. This clever thing is nothing but a little paper cup with a pipe cleaner poked through the bottom.  Serviceable all these years.

Beside the bell is another bell, this one fabricated by David in 1975 when he was at McDonough #15 in  New Orleans.  It's made of magenta felt with some lace glued along the bottom and two seashells and three beads glued above the lace.  This is the last surviving of these, which once numbered at least three.

On the right is reindeer, probably a Rudolph, made of three ancient-history wooden clothespins and a few black felt dots glued on along with the red yard ball nose.  In 1981 Erik was 5 and still at the ECDC in kindergarten.  He colored the reindeer's head with a few strokes of brown crayon.
Michael's handprint ornament is the oldest of all:  he did it when he was in pre-school at St. Lawrence the Martyr in the outskirts of New Orleans, around 1970.  There were originally two of these, one for each hand I guess, but the only survivor is this right hand.  He really had big hands!

And on the right is the last remaining ojo dos dios (God's Eye, probably spelled wrong) that I believe came from around 1971, made by Michael and me at home.  I had learned how to make these from a teacher at the school where I was teaching, and I remember teaching him how to do them. 

Friday, December 19, 2014

Hats and Scarves and a Homemade Portable Xmas Tree

At crit group this morning great hats and scarves abounded.  Here is M in her felt elf hat, and on the right is L's yummy maroon velvet hat.
I didn't draw all of the scarves, just the ones across from me that I could see without contortions and obvious staring.  On the left is L's lacey green one, and on the right is H's lovely blue.
M had a multi-colored scarf, and on the right is a quick sketch made from a photo of the recycled picnic table portable xmas tree that M made. The stand is not accurate, but the pole, slats of wood, twigs, folk art chicken on top and sparkly light-entwined tinsel are.  What doesn't come across in my sketch is the pure light and magic quality of this very funky tree.  M said it comes apart and can fit in a small box for traveling (although the pole is 6 feet tall).  She plans on bringing it to New York.  Our crit group-- bread and air!

Thursday, December 18, 2014

A Clutch of Frozen Charlottes

My friend F brought me a little porcelain figure from an antique store in California a few months ago.  I researched to find out what I could about this intriguing object.  It reminded me of the old- fashioned 50s-style king cake Baby Jesus dolls that we used to break our teeth on in New Orleans when we ate king cake around Mardi Gras time.  (whoever found a Baby Jesus in her piece of king cake had to give the party the next week).  It turns out that these aren't king cake dolls but are, rather, Frozen Charlotte dolls, which you should look up if this kind of thing interests you as much as it does me.   Anyway, yesterday F gave me FIVE MORE Frozen Charlottes, and now I have a collection.  I love that they are not just ordinary painted and dressed up Charlottes, but that they are damaged and rejected ones.  The man who sold them to F had them in a bucket behind the counter.  Apparently they were made between 1860 and 1920 or so, mostly in Germany.  Imperfect dolls were thrown out behind the factories in midden heaps of dolls.  Today some people excavate the broken rejects.

I much prefer these rejects.  I'm still playing with mine, drawing them in different settings, wondering what they're going to lead me to.  I love the way it feels to hold all six of them at once and jiggle them around.  They make a nice soft clinking sound.  Mine are all handless, and many are missing feet, which only adds to their appeal.  Here, above, are some first attempts at drawing them.  They're not easy to draw since they're so featureless and lumpy.  They are definitely relatives of the Rusty Child Forms.  Thank you, F, for knowing how much I would love this gift!

Wednesday, December 17, 2014

Cairn Building

Michelle and I set out this morning on a mission to rebuild some of the cairns that an unknown-to-us cairn builder had built last spring and that had since been toppled.  We had especially enjoyed this group of cairns and wanted to restore at least some of them.  We found rocks strewn around in the grassy woods near the river and one lone cairn still standing.  I at first approached this project intending to impose and restore order, but Michelle was more willing to quietly look at the rocks and follow their direction.  This seemed a better approach to me,  especially after I watched her successfully balance some rocks that I would never have attempted to balance.
We had a wonderful time out there in the chilly breeze with the river singing in the background.  We used the rocks in the locations in which we found them, and we left some vines in place on rocks as well as some rocks on the ground.  We didn't try to make people or animals, but after we completed the cairns we noticed that some looked like women walking or small children or altarpieces or even a bird.
We made eight, five on a procession and three more a little distance away in a separate grouping.  The lone old cairn stands between our two groups.  I drew some of the cairns while Michelle sat on a large stone and listened to the river.  When my hands were thoroughly frozen we hiked back to my house.  We want to come back soon and build some more plus build some in some other locations.  These cairns really built themselves!

Tuesday, December 16, 2014

Working Thinking Planning Drawings

A customer asked F and me to design and make a wallet based on a leather wallet that is very clever and that is itself based on a Japanese origami fold.  The customer wanted the wallet to be made out of recycled coffee bags, which she supplied.  Here are sketches that I made to better understand the original wallet, of which we had only a few photographs and one diagrammatic drawing.

I began to think of a few modifications that might make our materials work better, such as a separate flap for the coin purse (which turned out to not be necessary, but here it is in its first appearance).

 This page contains crazy ideas for ways of cutting the pattern, none of which panned out.

I began working with the material and made a mock-up.  Some new problems surfaced regarding the credit card slot.
 I realized the mock up had some flaws, so here's a drawing showing some changes that needed to be made.  I also began to list the order in which assembly had to take place.

Eventually the modified mock-up or prototype yielded information about the pattern pieces and their dimensions.  Thursday we will cut the pattern pieces and refine the design.  It's a nice compact little wallet, and we can sell it for less than half the price of the leather and metal snaps design.  Now to test it out, the best part of designing.

Meanwhile, the amaryllis is going nowhere, but the tulips are taking off!

Monday, December 15, 2014

Concluding the Tutorial

Here's last night's ruined hat drawing, pulled back from the brink by the application of small spots of watercolor mixed with gouache.  The dots at bottom right show the main colors of the dots that I used.  The gouache is opaque, so it stands on the surface of the paper and visually seems to come forward a bit, making the knit look soft and textured.
And here is the detail of a knitted section after receiving the same treatment.  I didn't add any ink but did use small bits of very dark Payne's grey watercolor.
For reference, here's the hat at stage two after being brushed with clear water. 
And here's the small sample of knit at that same scary stage.
And back to the original line drawing of the hat--
And the original drawing of the detail.

Sunday, December 14, 2014

Hat Drawing Tutorial, Steps 1 and 2

Phase 1 of these hat drawings:  First make a rather complete ink drawing. 

I used a black Pilot V-5 Hi-Tecpoint 0.5 pen that is more or less waterproof after completely dry.  This is how I started all the hat drawings.  The more texture and detail, the better.  (I can't buy this pen in the US, can't even order it from anywhere in the US.  Why is this?  It's a great pen, but I have bought my last two batches in Paris and Barcelona and was finally able to order twelve from England, but the postage was killing.  It's a pain to have to go to such lengths to buy this pen!)
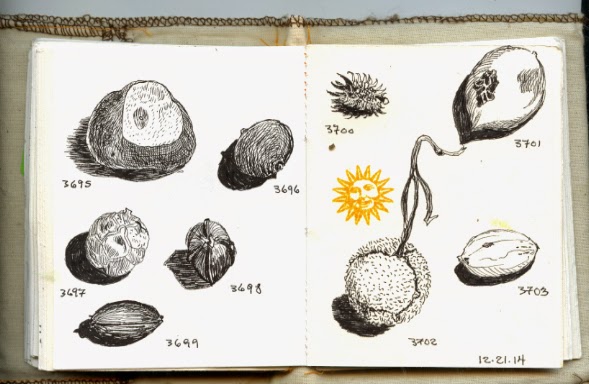
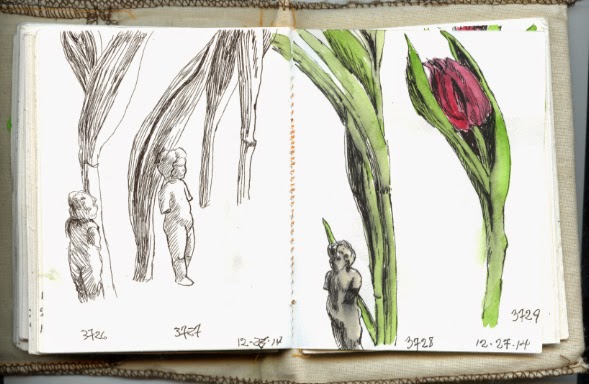
(Okay, a brief veer into the amaryllis, which has started to change in that what looked like a tall leaf is actually turning out to be some kind of leaf covering that is now drying up and growing transparent.)

In the middle, a detail of the hat, showing the amount of texture that seems to work well.  (And then one of the tulips in its new taller more leafy stage.)

So find a knitted hat and go do a detailed textural drawing of it.  Now I'm going to go paint over my two textural hat drawings and show you step two.
Step 2:  This is the scary part of this drawing, when you lose all control.  You must do it soon after making the textural drawing while the ink is still somewhat wet.  (Note that if you use a pen with NON- waterproof ink you can wait as long as you want to do step 2 because the ink will still wet up.)  I use clean water and a #12 round watercolor brush, the only brush I ever use, but you can use whatever brush you have and enjoy using for watercolor drawing.  It helps if it is a round brush and one that holds a good point.  I begin in the least textural areas, such as the pompom and the inside flannel lining panels.  I wash the brush frequently to keep the ink from completely blacking out the drawing.
The same goes for the detail of the knitted hat, shown to the left.    Tomorrow I'll show how to add the color with white gouache and watercolors.  It's good to let the watery mess dry thoroughly before continuing.  So put this away for now and go get a tube or jar of waterproof white opaque watercolor, called gouache.  Don't worry if your nice drawing is now a mess.  Mine is too, and I never have any confidence that it's going to come out right;  but something alchemical happens next!

Saturday, December 13, 2014

Hats Again Plus Stowaway Bald Cypress Cone

Two more spectacular hats from Greenlife (Whole Foods small local-ish store), the one on the left a fish, and the one on the right a manly chain mail crossed with motorcycle goggles and finished off with -what else? braids.  Asheville is a town of many great hats.  I hope people wear hats like this in the places I'm sending them--
I found a stowaway bald cypress cone in the bottom of my bag when we got home from NOLA.  After a couple of days on my drawing table it began to separate into sections, very much like a Chinese puzzle.  It was possible to reassemble it like a puzzle, too!  I've never seen a cone like this.  It smells very spicy and resinous.  I read that the oily resin is really good for preserving wood.

Friday, December 12, 2014

Lumpy Drawings on Unsuitable Substrates

Annie and I set out for a little walk this afternoon.  I asked her what kind of a hike she wanted-- flat, steep climb, trail, off-trail, etc.  She said she wanted to go find the things in the woods that I [really Michelle] had found last spring.  "The shelter?" I asked, incredulous that anyone would trust me to lead them to this elusive and hard-to-find feature.  But that's what she wanted, and I was so excited to have someone who was willing to slog through brambles and follow directions such as "head southeast, or, towards the chimney that's not quite visible but that will be soon;  now we walk 168 steps and head left at the tree that used to be bent over the path" that I didn't hesitate.  We used some of my old maps from last year, and then I drew a new one to record how things had changed over the summer and what last year's path now looks like.
Our first attempt was to head up the bramble slope behind the chimney, following one of the old maps that I had made of coming back that way.  After about half an hour of climbing the ridge and skirting a rhododendron hell, what I had expected to be a gully turned out to be the Ruins Trail that I walk on many times each week.  How on earth ---?  I sketched out what I think happened in the map above, which is NOT at all to scale, and now am wondering if the mysterious "Shelterwood" sign on the Ruins Trail might not refer to the woods where the shelter is!  Something to check out for sure.  Meanwhile, we decided to go the roundabout way via the Ruins trail to the overlook by the clay flats.  
 At one point we came across some very nice bracket fungus-y fungus on a downed tree.  We broke off a few pieces and did some Lascaux Cave-like drawings.  I admire the way the cave artists used the bumps and lumps on the walls as part of the form of their paintings.  I have a new respect for their skill.  On the left is a drawing of a fungus on the fungus.  On the right, the shelter itself, done after we actually found the shelter.  It was exciting to find the shelter just as the sun was setting and the fast evening was slamming down.  We each did a fast drawing of the shelter, then decided to try to find our way off-trail back down to the Mindy Sue Trail by the chimney.  Using a map Michelle and I made last year, we succeeded in spotting the chimney and then slashing our way down the slope through the brambles and over the downed trees, back to the trail.  A short half mile later we were home.
Meanwhile, a tiny baby has sprouted beside one of the larger tulips, and a new leaf is showing from the split in one of the larger ones!